Interacting with Particle Auth within applications made using Flutter
Particle Auth for Flutter
The Particle Auth Flutter SDK enables full stack integration of Particle Auth into applications built on Flutter. This includes everything from the initial configuration of Particle's Wallet-as-a-Service to specific interactions. Specifically in this case, Flutter can be leveraged in either Android or iOS environments, both to the same degree. This is done primarily through Dart.
Platform-specific configuration instructions, alongside examples of utilization, can be found below.
Getting Started
Interaction with the Particle Auth Flutter SDK is quite standard and in line with other Particle Auth SDKs, although the key deviations can be found within the configuration process. The configuration process of this SDK differs significantly based on whether you're using Flutter on Android or iOS.
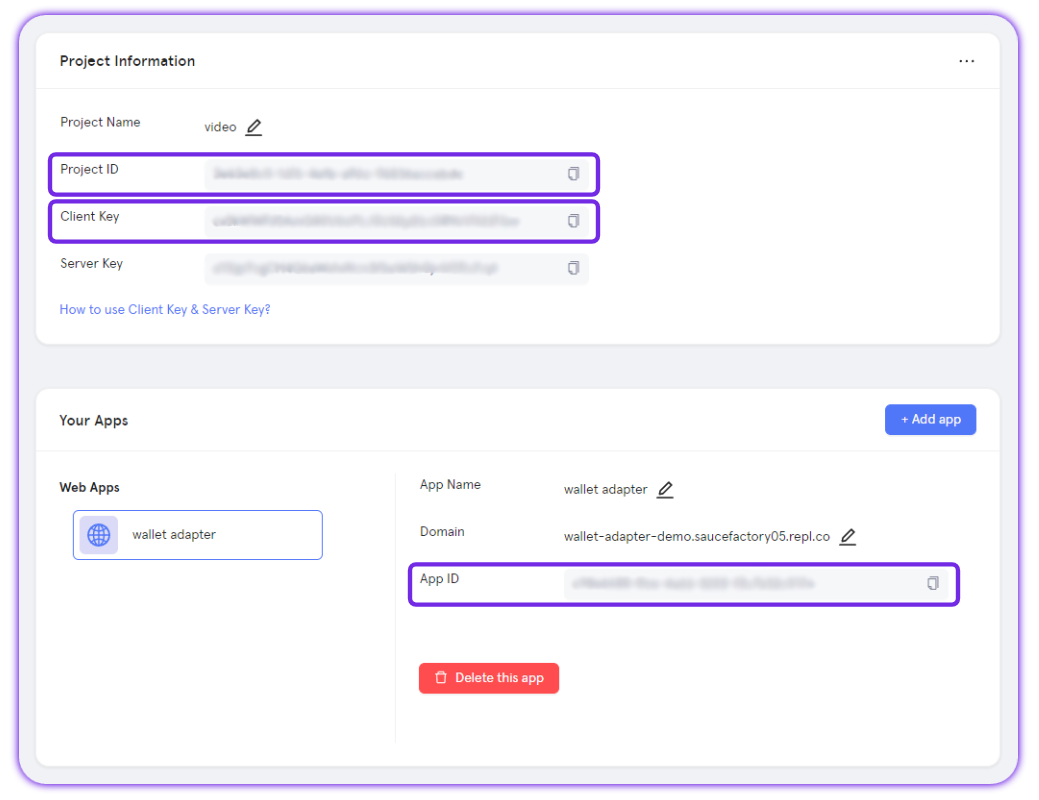
To begin, you'll need to head over to the Particle dashboard and retrieve your projectId, clientKey, and appId.
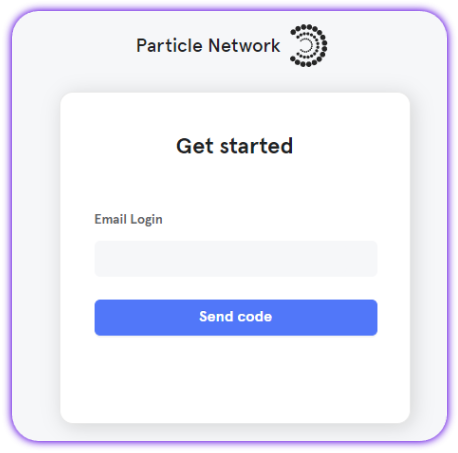
- Sign up/log in to the Particle dashboard.

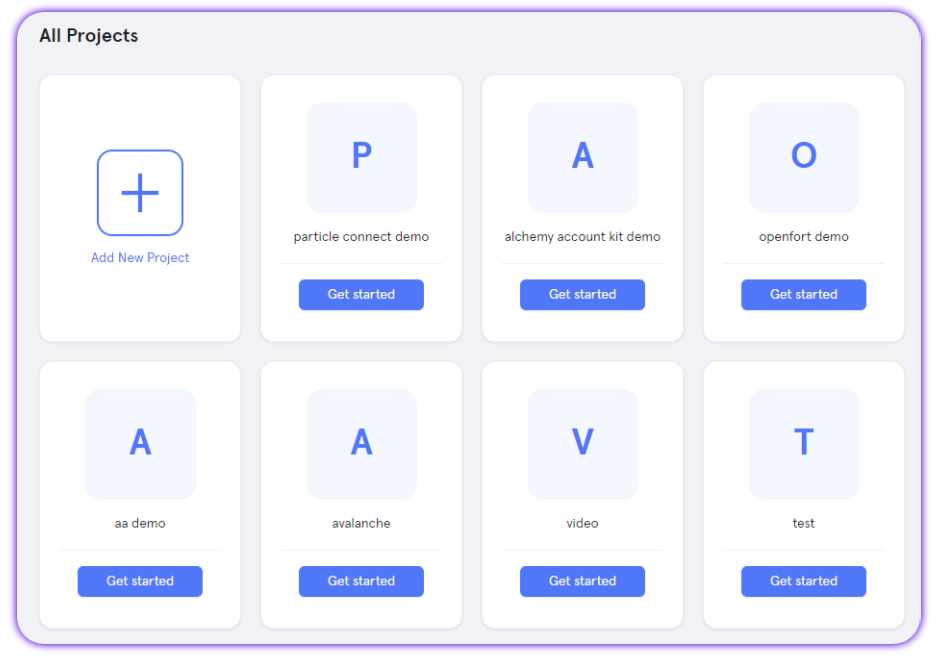
- Create a new project or enter an existing project.

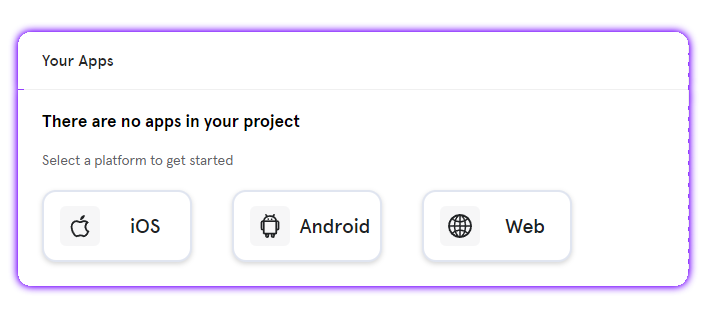
- Create a new application, or skip this step if you already have one.

- Retrieve the project ID (
projectId), the client key (clientKey), and the application ID (appId).

Adding the Particle Auth Flutter SDK to your application
Additionally, regardless of platform, you'll need to begin by adding particle_auth_core to your Flutter application; this is a requirement before moving onto platform-specific configuration.
flutter pub add particle_auth_core
Android configuration
If you're building an Android application with Flutter, you must follow the steps below to configure Particle Auth. To begin, you'll need to go ahead and open your build.gradle file, often found at the following file path: ${project name}/android/app/build.gradle
Within your build.gradle file, you'll need to add four new lines to ensure Particle Auth runs appropriately:
minSdkVersion, which in most cases will be set to23.manifestPlaceholders["PN_PROJECT_ID"], theprojectIdpreviously retrieved from the Particle dashboard.manifestPlaceholders["PN_PROJECT_CLIENT_KEY"], theclientKeypreviously retrieved from the Particle dashboard.manifestPlaceholders["PN_APP_ID"], theappIdpreviously retrieved from the Particle dashboard.
// Example
defaultConfig {
  applicationId "com.example.particle_auth_test"

  minSdkVersion 23 // Required by Particle Auth
  targetSdkVersion flutter.targetSdkVersion
  versionCode flutterVersionCode.toInteger()
  versionName flutterVersionName

  manifestPlaceholders["PN_PROJECT_ID"] = "EXAMPLE"
  manifestPlaceholders["PN_PROJECT_CLIENT_KEY"] = "EXAMPLE"
  manifestPlaceholders["PN_APP_ID"] = "EXAMPLE"
}
Staying within your build.gradle file, you'll need to ensure that you're using version 11 of Java in both compileOptions and kotlinOptions, alongside enabling dataBinding.
// Example
compileOptions {
  sourceCompatibility JavaVersion.VERSION_11
  targetCompatibility JavaVersion.VERSION_11
}

kotlinOptions {
  jvmTarget = JavaVersion.VERSION_11
}

dataBinding {
  enabled = true
}
Finally, for dependency management, within build.gradle you'll need to ensure that the repositories object in both buildscript and allprojects has maven { setUrl("https://jitpack.io") } present, such as is shown below.
// Example
buildscript {
  ...
  repositories {
      google()
      mavenCentral()
      maven { setUrl("https://jitpack.io") }  // Add this
  }

  dependencies {
      ...
  }
}


allprojects {
  repositories {
      google()
      mavenCentral()
      maven { setUrl("https://jitpack.io") }  // Add this
  }
}

...
iOS configuration
If you're building an iOS application with Flutter, this also entails a unique and iOS-specific configuration process. Before beginning, ensure your project meets the following prerequisites:
-
Xcode 15.0 or later.
-
iOS 14 or later.
With these requirements set, you'll need to open an exported iOS project and find ios/{project name}.xcworkspace.
At the root of your Xcode project, create a new file, ParticleNetwork-Info.plist. Ensure this is marked under "Target Membership."
Now, with a fresh ParticleNetwork-Info.plist file, go ahead and fill it in with the following:
<?xml version="1.0" encoding="UTF-8"?>
<!DOCTYPE plist PUBLIC "-//Apple//DTD PLIST 1.0//EN" "http://www.apple.com/DTDs/PropertyList-1.0.dtd">
<plist version="1.0">
<dict>
	<key>PROJECT_UUID</key>
	<string>YOUR_PROJECT_UUID</string>
	<key>PROJECT_CLIENT_KEY</key>
	<string>YOUR_PROJECT_CLIENT_KEY</string>
	<key>PROJECT_APP_UUID</key>
	<string>YOUR_PROJECT_APP_UUID</string>
</dict>
</plist>
Similar to the Android configuration, you'll need to fill in PROJECT_UUID (projectId), PROJECT_CLIENT_KEY, and PROJECT_APP_UUID (appId) with the corresponding values retrieved from the Particle dashboard.
Finally, you'll need to edit your Podfile to ensure particle_auth_core is properly imported. Head over to the linked guide to complete this, if you haven't already.
Another important note before continuing
Our SDK is a static library (XCFramework). When using the Particle Auth Core Flutter SDK, you'll need to specify that you're using a static framework through the following:
target 'Runner' do
  use_frameworks! :linkage => :static
  # user particle_auth_core
  pod "Thresh
  pod "ParticleMPCCore"
  pod "ParticleAuthCore"
  pod "AuthCoreAdapter"

  pod 'ParticleNetworkBase'
  pod 'ConnectCommon'
end
Examples of utilization
Initialization
Before using the full extent of the SDK, you'll need to initialize it with init, passing in specific chain in which you intend to primary onboard to within Particle's Wallet-as-a-Service. This is represented as an object containing chain info (often derived from ChainInfo.{Chain}).
// set the project info, get it from dashboard.
ParticleInfo.set(projectId, clientKey);

// inititilze ParticleAuth and ParticleAuthCore.
ParticleBase.init(ChainInfo.Ethereum, env);
ParticleAuthCore.init()
Login
Now that you've installed, configured, and initialized Particle Auth Core, you'll need to initiate a login and throw a social login prompt for a user to authenticate through. Post-login (through the menu obtained via the login), a user will have an account generated, thus unlocking the remaining SDK methods for interaction.
This is achieved and configured through ParticleAuthCore.connect. Once this method is called, the corresponding login popup will be thrown by requesting user authentication before returning to the application in a signed-in state.
ParticleAuthCore.connect takes the following parameters:
loginType, the mechanism of social login to be thrown; such as email, Google, Twitter, etc:LoginType.emailLoginType.phoneLoginType.googleLoginType.facebookLoginType.appleLoginType.twitterLoginType.discordLoginType.githubLoginType.twitchLoginType.microsoftLoginType.linkedinLoginType.jwtaccount, for predetermined/expected phone numbers or emails. This can be optimally used if you're using custom authentication with JWTs. It is also a required field with the expected JWT in question.supportAuthTypes, the authentication types to be supported/shown in the authentication popup. The types listed here will be available as additional buttons in the generalized popup that shows within email- and phone-based logins, such as:SupportAuthType.appleSupportAuthType.googleSupportAuthType.facebookSupportAuthType.discordSupportAuthType.githubSupportAuthType.twitchSupportAuthType.microsoftSupportAuthType.linkedinSupportAuthType.phoneSupportAuthType.emailSupportAuthType.twitter
authorization, an optional field in which a message can be passed for signature for added authorization.
ParticleAuthCore.connect(LoginType.google, prompt: SocialLoginPrompt.select_account);

ParticleAuthCore.connect(LoginType.email, supportAuthTypes: SupportAuthType.values, prompt: SocialLoginPrompt.select_account);
Is Connected
There may be scenarios in which knowing whether a current session (a user) is currently logged in with Particle Auth or not is important. This is achieved through ParticleAuthCore.isConnected (server-side check).
await ParticleAuthCore.isConnected();
Disconnect
To exit an existing session (logging a user out), you can simply call ParticleAuthCore.disconnect .
await ParticleAuthCore.disconnect();
Get Address
To retrieve the address, you can call Evm.getAddress or Solana.getAddress.
final address = await Evm.getAddress();
final address = await Solana.getAddress();
Sign Message
To throw a standard message for signature (meaning a user will be prompted in-UI to sign a given string), you can call Evm.personalSign, This method on EVM requires a hexadecimal string, as shown below. Otherwise, on Solana, you can pass in a UTF-8/readable string.
final messageHex = "0x${StringUtils.toHexString("Hello Particle")}";
String signature = await Evm.personalSign(messageHex);
String signature = await Evm.personalSignUnique(messageHex);

const message = "Hello Particle";
final signature = await Solana.signMessage(message);
Sign Transaction
This is a Solana-specific method for signing a transaction without sending it. Similar to message signing, this will prompt a signature in-UI with details about the transaction. Programmatically, the proposed transaction should be formatted as a (converted to a) base58 string. Passing in an object directly will not work in this case.
final signature = await Solana.signTransaction(transaction);
Sign All Transactions
Following the aforementioned method, you can use Solana.signAllTransactions to propose a collection of Solana transactions for signature, rather than just a single transaction.
List<String> signatures = await Solana.signAllTransactions(transactions);
Sign and Send Transaction
For more generalized transaction sending, Evm.sendTransactionand Solana.signAndSendTransaction will be the primary method used in virtually every scenario. This will propose a signature (on both EVM and Solana), and then immediately push it to the network once confirmed. For EVM, the transaction passed into Evm.sendTransaction will need to be a hexadecimal string, while Solana requires a base58 string.
final signature = await Evm.sendTransaction(transaction);
final signature = await Solana.signAndSendTransaction(transaction);
Sign Typed Data
Evm.signTypedData is an EVM-specific method for signing structured (typed) data. For more information on signTypedData, see the Web (JavaScript/TypeScript) page.
// your typed data is a json string
String typedDataHex = "0x${StringUtils.toHexString(typedData)}";

String signature = await Evm.signTypedData(typedDataHex);
String signature = await Evm.signTypedDataUnique(typedDataHex);
Set Chain Info
If you'd like to set the chain being utilized (after initially defining this in init), you can call either ParticleBase.setChainInfo (synchronous) or ParticleAuthCore.switchChain (asynchronous), and pass in a chain information object, often derived from ChainInfo.{Chain}.
await ParticleBase.setChainInfo(ChainInfo.Ethereum);

await ParticleAuthCore.switchChain(ChainInfo.Ethereum);
Get Chain Info
For the retrieval of the currently selected (primary) chain within an active session, you'll need to call ParticleBase.getChainInfo. This returns a ChainInfo object containing:
name, the name of the chain in question (ex: Ethereum).id, the ID of the chain in question (ex: 11155111).network, the specific network corresponding to the chain ID (ex: Sepolia)
final chainInfo = await ParticleBase.getChainInfo();
int id = chainInfo.id;
String name = chainInfo.name;
String network = chainInfo.network;
Set Security Account Config
Another important component of integrating the Particle Auth SDK (Wallet-as-a-Service) is the (optional) security account requirements enforced upon application users. For all accounts on Particle, several security options are associated (such as a master password for a login-based non-recoverable password, payment password for a pin required upon transaction signatures, etc.)
Within the SDK, you can configure the frequency (or requirement) a user is asked to configure security settings. This is controlled with ParticleBase.setSecurityAccountConfig and passing in a SecurityAccountConfig object with two parameters:
promptSettingWhenSign, security account config prompts (default is 1).promptMasterPasswordSettingWhenLogin, master password prompts (default is 0).
0means a prompt is never shown requesting this setting.1means a prompt is shown only upon the first startup.2means a prompt is shown every time.3means force set payment password before sign.
final config = SecurityAccountConfig(1, 2);
ParticleBase.setSecurityAccountConfig(config);
Open Account and Security Page
Following the above, if you'd like to force the opening of account/security settings (in-UI), you can do so with ParticleAuthCore.openAccountAndSecurity.
await ParticleAuthCore.openAccountAndSecurity();
Has Master Password, Payment Password, Security Account
Similarly to the isConnected function covered prior, there are various scenarios in which knowing whether or not a user has specific security settings enabled may be useful. In the case of the Particle Auth Flutter SDK, this can happen in one of two ways:
With the built-in ParticleAuthCore.hasMasterPassword, ParticleAuthCore.hasPaymentPassword, and ParticleAuthCore.changeMasterPassword methods.
await ParticleAuthCore.hasMasterPassword();
await ParticleAuthCore.hasPaymentPassword();
await ParticleAuthCore.changeMasterPassword();
EvmService utilization examples
EvmService utilization examplesIn addition to ParticleAuth for authentication and interaction with Particle's Wallet-as-a-Service, the Flutter SDK also includes a class, EvmService, for general interaction with EVM chains.
Write Contract
EvmService.writeContract allows you to execute a write contract call defined by a specific method and set of parameters. This requires a corresponding ABI, contract address, and requester public address.
String contractAddress = "your contract address";
String methodName = "your method name"; // this is your contract method name, like balanceOf, mint.
List<Object> params = <Object>["0x1"]; // this is the method params, each parameter requires a hexadecimal string.

// abi json string, you can get it from your contract developer.
// such as
// [{\"inputs\":[{\"internalType\":\"uint256\",\"name\":\"quantity\",\"type\":\"uint256\"},{\"internalType\":\"uint256\",\"name\":\"amount\",\"type\":\"uint256\"}],\"name\":\"mint\",\"outputs\":[],\"stateMutability\":\"nonpayable\",\"type\":\"function\"}]
const abiJsonString = null;
final result = await EvmService.writeContract(publicAddress, contractAddress, methodName, params, abiJsonString, gasFeeLevel: GasFeeLevel.high);
Read Contract
EvmService.readContract allows you to execute a read-only contract call defined by a specific method and set of parameters. This requires a corresponding ABI, contract address, and requester public address.
String publicAddress = "your public address";
String contractAddress = "your contract address";
String methodName ="your method name"; // ex: balanceOf, mint
List<Object> parameters = <Object>["0x1"];

// abi json string, you can get it from your contract developer.
// such as
// [{\"inputs\":[{\"internalType\":\"uint256\",\"name\":\"quantity\",\"type\":\"uint256\"},{\"internalType\":\"uint256\",\"name\":\"amount\",\"type\":\"uint256\"}],\"name\":\"mint\",\"outputs\":[],\"stateMutability\":\"nonpayable\",\"type\":\"function\"}]
const abiJsonString = null;
final result = await EvmService.readContract(publicAddress, contractAddress, methodName, parameters, abiJsonString);
Create Transaction
EvmService.createTransaction facilitates the construction of a transaction object derived from the standard from, to (receiver in this example), amount (value), and data fields. This transaction, once constructed with EvmService.createTransaction, can be passed for in-UI proposal with Evm.sendTransaction.
String from = "your public address";
String receiver = "to address"
String contractAddress = "contract address"
BigInt amount = BigInt.from(1000000000000000);
String to = contractAddress;
final data =  await EvmService.erc20Transfer(contractAddress, receiver, amount);

final transaction = await EvmService.createTransaction(from, data, BigInt.from(0), to, gasFeeLevel: GasFeeLevel.high);
Estimate Gas
Given a standard transaction structure (detached set of values, as shown below), gas estimations can be ran to simulate and retrieve the volume of gas to be consumed by a specified transaction (wrapper for eth_estimateGas). This is done through EvmService.ethEstimateGas.
final gasLimit = await EvmService.ethEstimateGas(from, to, value, data);
Get Suggested Gas Fees
To retrieve categorized gas price suggestions (3 categories scaling from low to high) based upon current network conditions, you can call EvmService.suggestedGasFees.
final gasFees = await EvmService.suggestedGasFees();
Get Tokens and NFTs
EvmService also extends to Data API methods such as getTokensAndNFTs, which returns a highly detailed JSON list of ERC20 tokens and ERC721 NFTs belonging to a specified address. This is accessible through EvmService.getTokensAndNFTs, passing in the public address to retrieve the tokens and NFTs of.
final result = await EvmService.getTokensAndNFTs(address);
Get Transactions by Address
Similar to the former method, EvmService.getTransactionsByAddress enables the retrieval of a detailed JSON response containing a complete list of transactions involving a specified address.
final result = await EvmService.getTransactionsByAddress(publicAddress);
Get price
To retrieve token price based upon current network conditions, you can call EvmService.getPrice.
final result = await EvmService.getPrice(tokenAddresses, currencies);
Basic rpc method
Call any basic EVM rpc method through EvmService.rpc
final result = await EvmService.rpc(method, params);
SolanaService utilization examples
SolanaService utilization examplesIn addition to ParticleAuth for authentication and interaction with Particle's Wallet-as-a-Service, the Flutter SDK also includes a class, SolanaService, for general interaction with Solana chains.
Get Tokens and NFTs
SolanaService also extends to Data API methods such as getTokensAndNFTs, which returns a highly detailed JSON list of SPL tokens and NFTs belonging to a specified address. This is accessible through SolanaService.getTokensAndNFTs, passing in the public address to retrieve the tokens and NFTs of.
final result = await SolanaService.getTokensAndNFTs(publicAddress, true);
Serialize Transactions
SolanaService.serializeSolTransaction facilitates the construction of a SOL transaction object,
SolanaService.serializeSplTokenTransaction facilitates the construction of a Spl-token transaction object,
SolanaService.serializeWSolTokenTransaction facilitates the construction of a unwrap wsol transaction object.
These transactions, once constructed , can be passed for in-UI proposal with Solan.signAndSendTransaction.
final transaction = SerializeSOLTransaction();
transaction.lamports = TestAccount.solana.amount.toInt();
transaction.receiver = TestAccount.solana.publicAddress;
transaction.sender = publicAddress;

final result = await SolanaService.serializeSolTransaction(transaction);
final serializedTransaction = result["transaction"]["serialized"];
final transaction = SerializeSplTokenTransaction();
transaction.amount = TestAccount.solana.amount.toInt();
transaction.receiver = TestAccount.solana.publicAddress;
transaction.mint = TestAccount.solana.tokenContractAddress;
transaction.sender = publicAddress;

final result = await SolanaService.serializeSplTokenTransaction(transaction);
final serializedTransaction = result["transaction"]["serialized"];
final transaction = SerializeWSOLTransaction();
transaction.address = publicAddress;

final result = await SolanaService.serializeWSolTokenTransaction(transaction);
final serializedTransaction = result["transaction"]["serialized"];
Get price
To retrieve token price based upon current network conditions, you can call SolanaService.getPrice.
final result = await SolanaService.getPrice(tokenAddresses, currencies);
Get transactions by address
To retrieve transactions from a address, you can call SolanaService.getTransactionsByAddress.
final result = await SolanaService.getTransactionsByAddress(address);
Get token by token address
To obtain the balance of a specified token at a specified address, you can call SolanaService.getTokenByTokenAddresses
final result = await SolanaService.getTokenByTokenAddresses(address, tokenAddresses);
Basic rpc method
Call any basic Solana rpc method through SolanaService.rpc
final result = await SolanaService.rpc(method, params);
Master reference
For a direct, raw view into every method provided through ParticleAuthCore, below is a table containing every relevant method alongside specific parameters and a short description. For methods listed but not covered in the above examples, live implementation often mimics the common structure covered throughout this document.
| Class | Methods | Parameters (* indicates optional) |
|---|---|---|
| ParticleBase | init | |
| ParticleBase | setChainInfo | chainInfo |
| ParticleBase | getChainInfo | |
| ParticleBase | setAppearance | appearance |
| ParticleBase | setSecurityAccountConfig | config |
| ParticleBase | setLanguage | language |
| ParticleBase | getLanguage | |
| ParticleBase | setFiatCoin | fiatCoin |
| ParticleAuthCore | init | |
| ParticleAuthCore | connect | loginType, account, prompt, loginPageConfig, supportAuthTypes |
| ParticleAuthCore | disconnect | |
| ParticleAuthCore | isConnected | |
| ParticleAuthCore | getUserInfo | |
| ParticleAuthCore | switchChain | chainInfo |
| ParticleAuthCore | changeMasterPassword | |
| ParticleAuthCore | hasMasterPassword | |
| ParticleAuthCore | hasPaymentPassword | |
| ParticleAuthCore | openAccountAndSecurity | |
| ParticleAuthCore | setBlindEnable | enable |
| ParticleAuthCore | getBlindEnable | |
| Evm | getAddress | |
| Evm | personalSign | message |
| Evm | personalSignUnique | message |
| Evm | signTypedData | message |
| Evm | signTypedDataUnique | message |
| Evm | sendTransaction | transaction, feeMode |
| Evm | batchSendTransactions | transactions, feeMode |
| Solana | getAddress | |
| Solana | signMessage | message |
| Solana | signTransaction | transaction |
| Solana | signAllTransactions | transactions |
| Solana | signAndSendTransaction | transaction |
