Leveraging Particle Connect within web applications
Particle Connect for Web
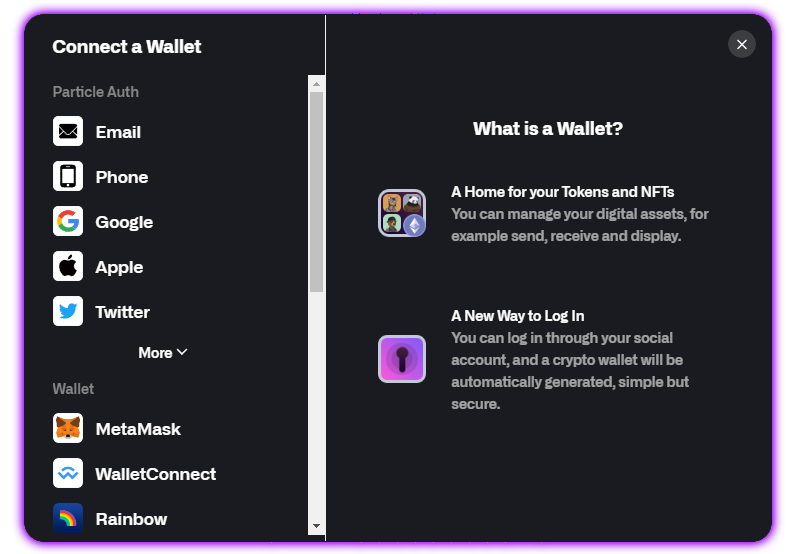
Particle Connect acts as a simple method of aggregating connection with both Web2 accounts through Particle Auth and Web3 accounts through traditional wallets, creating an equally accessible experience for both Web3 natives and traditional consumers. Specifically, Particle Connect is a custom connection modal built around interaction with Particle.
Leveraging Particle Connect as the primary connection mechanism (the "Connect" button within your application) only takes a few steps, as outlined below.
Demo
Before beginning, if you'd like to view a demo for Particle Connect, the official web demo contains a page with a standard implementation, viewable here.
Getting Started
Installation
Implementing Particle Connect can be achieved in four main steps. By the end of step four, your application will have a "Connect" button capable of onboarding both Web2 and Web3 users alike, powered directly by Particle Network.
For step one, you'll need to install the Particle Connect Web SDK.
yarn add @particle-network/connectkit
Setting up the Particle dashboard
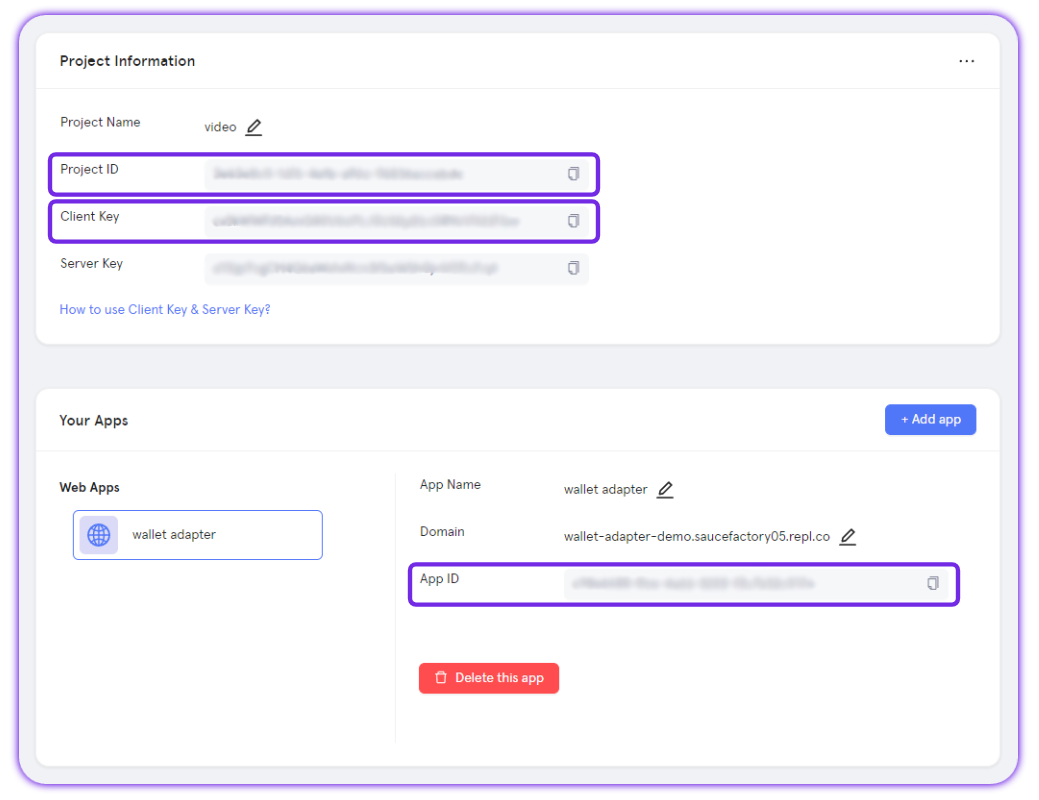
Before jumping directly into configuration and implementation, you'll need to make sure that you've retrieved your projectId, clientKey, and appId from the Particle dashboard. These are required values that you'll need in the coming configuration process. Retrieving these can be done through the following:
- Sign up/log in to the Particle dashboard
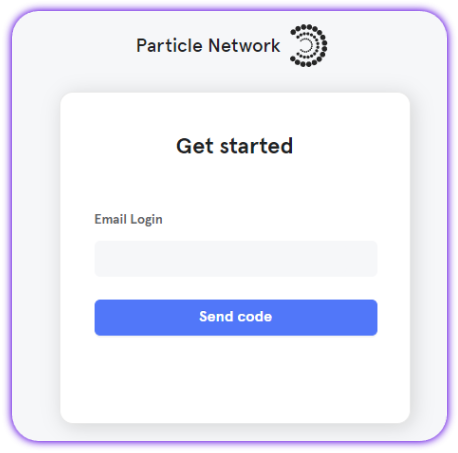
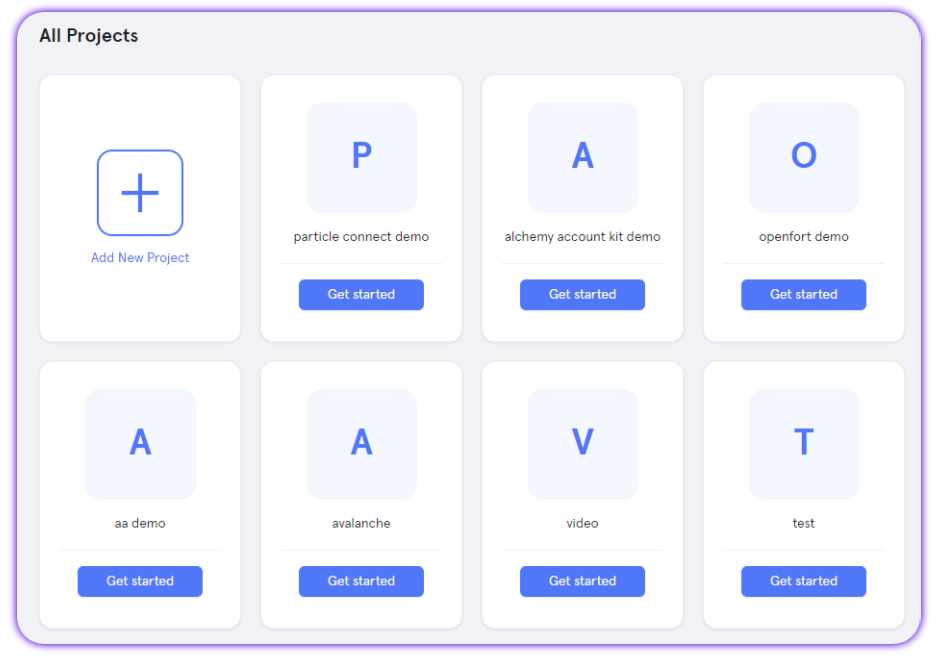
- Create a new project or enter an existing project if you already have one.
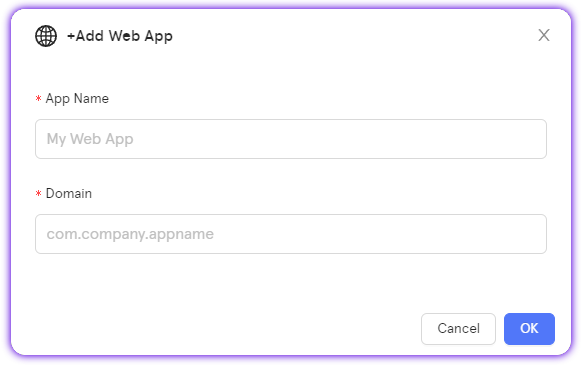
- Create a new web application, or skip this step if you already have one.
- Retrieve the project ID (
projectId), the client key (clientKey), and the application ID (appId).
Configuration
With Particle Connect installed, you'll need to open your index file and wrap your App component with ModalProvider, imported from @particle-network/connectkit. Within ModalProvider, you'll have a variety of configurations to set:
projectId,clientKey, andappId, these are required values for configuring Particle Connect and can be retrieved from the Particle dashboard
In addition to the configurations within options, you can set:
theme, the theme of the connection UI, eitherlight,dark, orauto(dependent on system settings).language, the language used by the connection UI (optional.)walletSort, the labels used for the different wallet categories (optional.)
Below is a code snippet showcasing a structured configuration of ModalProvider, leveraging the parameters listed above.
import React from 'react'
import ReactDOM from 'react-dom/client'
import { Ethereum, EthereumGoerli } from '@particle-network/chains';
import { ModalProvider } from '@particle-network/connectkit';
import '@particle-network/connectkit/dist/index.css';
import { evmWallets, solanaWallets } from '@particle-network/connectors';

ReactDOM.createRoot(document.getElementById('root') as HTMLElement).render(
  <React.StrictMode>
    <ModalProvider
        options={{
            projectId: process.env.REACT_APP_PROJECT_ID as string,
            clientKey: process.env.REACT_APP_CLIENT_KEY as string,
            appId: process.env.REACT_APP_APP_ID as string,
            chains: [Ethereum, EthereumGoerli],
            connectors: [
                ...evmWallets({ projectId: process.env.REACT_APP_WALLETCONNECT_ID, showQrModal: true }),
                ...solanaWallets(),
            ],
            erc4337: { //optional: account abstraction wallet UI config (displaying the smart account rather than EOA)
              name: "SIMPLE",
              version: "1.0.0"
            },
            wallet: { //optional: particle wallet config
                customStyle: {
                    supportChains: [Ethereum, EthereumGoerli],
                },
            },
        }}
    >
        <App />
    </ModalProvider>
  </React.StrictMode>
)
Adding the connection button
Moving out of your index file and into your main App component, you'll need to include the "Connect" button (ConnectButton from @particle-network/connectkit) to facilitate the utilization of Particle Connect.
A custom instance of the Connect button with modularized components can also be implemented by instead using ConnectButton.Customconfiguring specific customizations, as in the example below:
import { ConnectButton } from '@particle-network/connectkit';

// Standard ConnectButton utilization
export const App = () => {
  return <ConnectButton />;
};

// Custom ConnectButton utilization
export const App = () => {
  return (
      <ConnectButton.Custom>
        {({ account, chain, openAccountModal, openConnectModal, openChainModal, accountLoading }) => {
          return (
            <div>
              <button onClick={openConnectModal} disabled={!!account}>
                Open Connect
              </button>
              <br />
              <br />
              <button onClick={openAccountModal} disabled={!account}>
                Open Account
              </button>
              <br />
              <br />
              <button onClick={openChainModal} disabled={!account}>
                Open Switch Network
              </button>
              <div>
                <h3>account</h3>
                <p>{account}</p>
              </div>
            </div>
          );
        }}
      </ConnectButton.Custom>
  );
};
Examples of utilization
Check User is Connected
Once Particle Connect has been set up within a given application, you'll be able to check whether or not a user is connected (via Particle Connect, either with Particle Auth or a traditional Web3 wallet) through the utilization of useAccount.
import { useAccount } from '@particle-network/connectkit';

const account = useAccount();
if (account) {
  // Truthy indicates a successful login, active session
}
Connect React Hooks
As you may have noticed, Particle Connect comes with a number of important React Hooks for interacting with both Particle Connect and Particle Auth. They are:
-
useParticleProvider- Retrieval of the EIP-1193 provider instance to be used in ethers, web3.js, or viem. -
useAccount- Pulls the currently active account (address). -
useParticleConnect- Facilitates connection throughconnectanddisconnect. -
useConnectModal- Opens the connect modal (openConnectModal) without usingConnectButton. -
useConnectId- Retrieval of the connected ID. -
useSwitchChains- Switches and retrieves the current primary chain. -
useLanguage- Switches and retrieves current language used in UI. -
useWalletMetas- Returns wallet metadata.
## Connect Standalone
Finally, as briefly mentioned earlier, @particle-network/connectors can be used independently (through an instance of ParticleConnect in this case) for direct and detached utilization of Particle Connect. This provides the same level of functionality present in @particle-network/connectkit, but within an isolated environment, opening up the possibility for a custom UI implementation.
import { evmWallets, ParticleConnect } from '@particle-network/connectors';
import { Ethereum } from '@particle-network/chains';


const connectKit = new ParticleConnect({
            projectId: 'projectId',
            clientKey: 'clientKey',
            appId: 'appId',
            chains: [
                Ethereum
            ],
            connectors: evmWallets({ qrcode: false }),
        });

connectKit.connect('wallet id');

connectKit.connect('particle', options);

connectKit.disconnect();

connectKit.connectToCachedProvider();

connectKit.on('connect', (provider) => {});
connectKit.on('disconnect', () => {});
connectKit.on('chainChanged', (chain) => {});
connectKit.on('accountsChanged', (accounts) => {});

connectKit.switchChain(chain);

connectKit.walletMetas();

evmWallets();

evmInjectedWallet();

getInjectedProvider();
