Leveraging Particle Connect within applications built using Flutter
Particle Connect for Flutter
The Particle Connect Flutter SDK facilitates end-to-end integration of Particle Connect within applications built using Flutter on either iOS or Android. Particle Connect acts as the "SSO for Web3," aggregating authentication mechanisms from both Web2 (through MPC-TSS social logins) and Web3 (through traditional wallets with WalletConnect, Solana's wallet-adapter, and private key imports), thus reducing the barrier to entry within your application.
Instructions and examples for implementing Particle Connect within Flutter applications can be found below.
Repository
The Particle Connect Flutter SDK is also largely open-source through the particle-flutter GitHub repository. Before diving into the setup process below, it may help to build some context by diving into the underlying architecture and demos provided within this repository.
It is strongly discouraged to use the private key or mnemonic import/generate function. If you use it, you need to secure the data yourself, as Particle keeps no relationship with the imported/generated mnemonic or private key.
Getting Started
Configuring and setting up the Particle Connect Flutter SDK is relatively standard, although it differs significantly based on whether you're using Flutter on Android or iOS. However, for both platforms, the setup should be complete in just few minutes.
To begin, regardless of your platform, you must head over to the Particle dashboard and retrieve your projectId, clientKey, and appId.
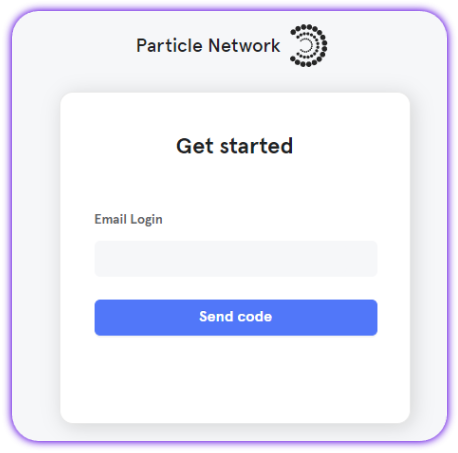
- Sign up/log in to the Particle dashboard.

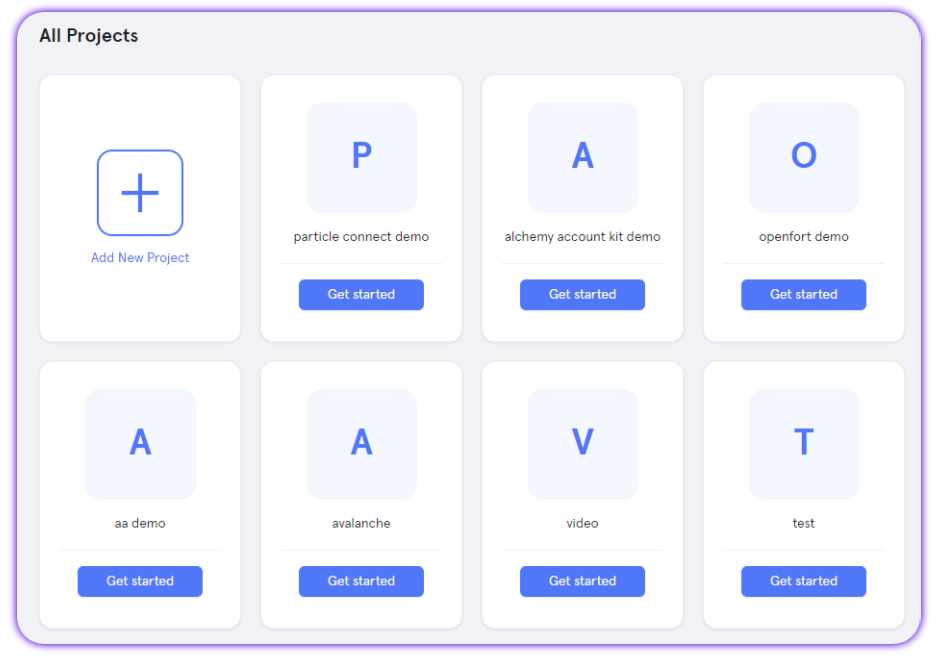
- Create a new project or enter an existing one.

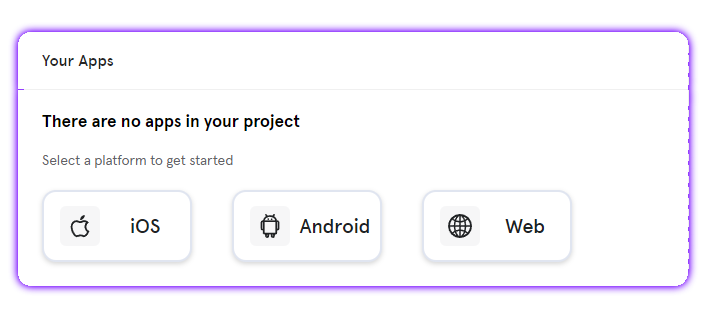
- Create a new application, or skip this step if you already have one.

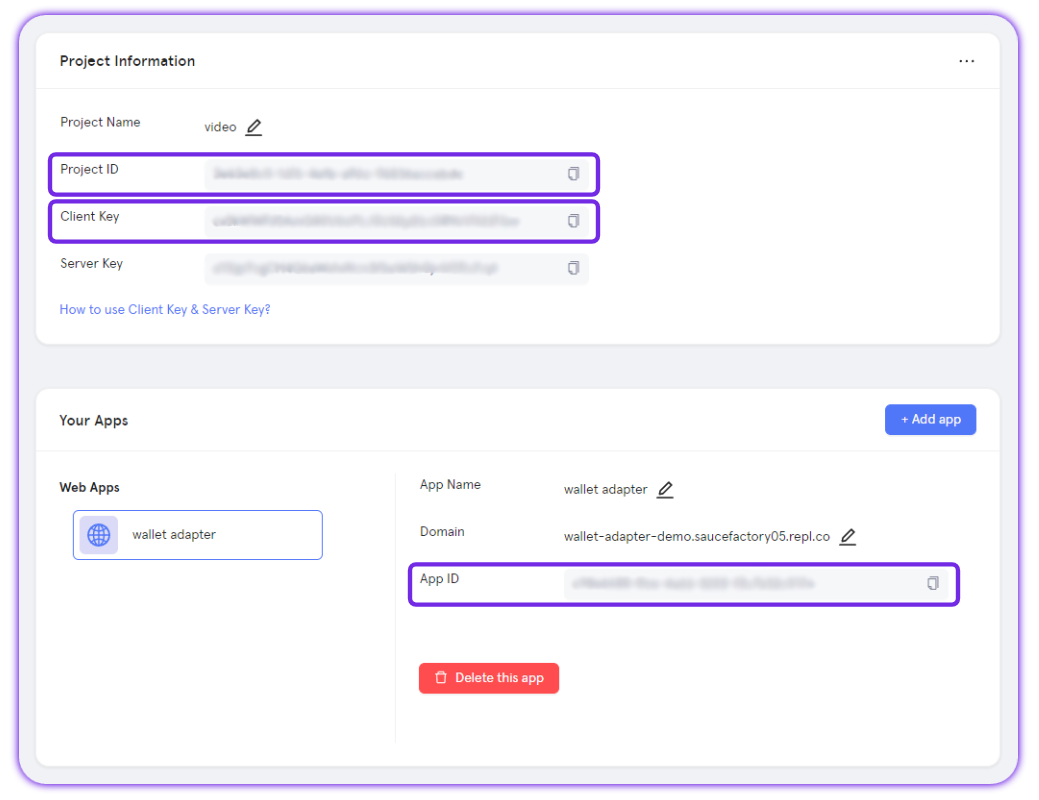
- Retrieve the project ID (
projectId), the client key (clientKey), and the application ID (appId).

Adding the Particle Connect Flutter SDK to your application
Additionally, regardless of platform, you'll need to add particle_connect to your Flutter application. This is a requirement before moving onto platform-specific configuration.
flutter pub add particle_connect
Android configuration
To configure Particle Connect and prepare for utilization, you can begin by going ahead and opening your build.gradle file, often found at the following file path: ${project name}/android/app/build.gradle
Within your build.gradle file, you'll need to add four new lines to ensure Particle Connect runs properly:
minSdkVersion. In most cases, this will be set to23.manifestPlaceholders["PN_PROJECT_ID"], theprojectIdpreviously retrieved from the Particle dashboard.manifestPlaceholders["PN_PROJECT_CLIENT_KEY"], theclientKeypreviously retrieved from the Particle dashboard.manifestPlaceholders["PN_APP_ID"], theappIdpreviously retrieved from the Particle dashboard.
// Example
defaultConfig {
  applicationId "com.example.particle_auth_test"

  minSdkVersion 23 // Required
  targetSdkVersion flutter.targetSdkVersion
  versionCode flutterVersionCode.toInteger()
  versionName flutterVersionName

  manifestPlaceholders["PN_PROJECT_ID"] = "EXAMPLE"
  manifestPlaceholders["PN_PROJECT_CLIENT_KEY"] = "EXAMPLE"
  manifestPlaceholders["PN_APP_ID"] = "EXAMPLE"
}
Additionally, staying within your build.gradle file, you'll need to ensure that you're using version 11 of Java in both compileOptions and kotlinOptions, alongside enabling dataBinding.
// Example
compileOptions {
  sourceCompatibility JavaVersion.VERSION_11
  targetCompatibility JavaVersion.VERSION_11
}

kotlinOptions {
  jvmTarget = JavaVersion.VERSION_11
}

dataBinding {
  enabled = true
}
iOS configuration
Before beginning, ensure your project meets the following prerequisites:
-
Xcode 15.0 or later.
-
iOS 14 or later.
With these requirements set, you'll need to open an exported iOS project and find ios/{project name}.xcworkspace.
At the root of your Xcode project, create a new file, ParticleNetwork-Info.plist . Ensure this is marked under "Target Membership."
From here, with a fresh ParticleNetwork-Info.plist file, go ahead and fill it in with the following:
<?xml version="1.0" encoding="UTF-8"?>
<!DOCTYPE plist PUBLIC "-//Apple//DTD PLIST 1.0//EN" "http://www.apple.com/DTDs/PropertyList-1.0.dtd">
<plist version="1.0">
<dict>
	<key>PROJECT_UUID</key>
	<string>YOUR_PROJECT_UUID</string>
	<key>PROJECT_CLIENT_KEY</key>
	<string>YOUR_PROJECT_CLIENT_KEY</string>
	<key>PROJECT_APP_UUID</key>
	<string>YOUR_PROJECT_APP_UUID</string>
</dict>
</plist>
Similar to the Android configuration, you'll need to fill in PROJECT_UUID (projectId), PROJECT_CLIENT_KEY, and PROJECT_APP_UUID (appId) with the corresponding values retrieved from the Particle dashboard.
Next, you'll need to head over to your AppDelegate.swift file to add an import of ParticleConnect.
import ParticleConnect
Within your application's application method (as shown below), you'll need to include a handler condition derived from ParticleConnect.handleUrl. This should be as simple as a true return upon a truthy value of ParticleConnect.handleUrl, and a super.application(app, open: url, options: options) return upon a falsy value.
override func application(_ app: UIApplication, open url: URL, options: [UIApplication.OpenURLOptionsKey: Any] = [:]) -> Bool {
  if ParticleConnect.handleUrl(url) {
      return true
  } else {
      return super.application(app, open: url, options: options)
  }
}
Wrapping up, you'll need to configure your application's scheme URL. To configure this, select your application from "TARGETS" under the "Info" section, then click "+" to add a URL type.
This should simply be set to "pn" + your projectId (retrieved and configured prior), resulting in a scheme URL that looks like the following:
pn63bfa427-cf5f-4742-9ff1-e8f5a1b9828f
Additionally, head over to your Info.plist file and include the following snippet:
<key>LSApplicationQueriesSchemes</key>
<array>
  <string>imtokenv2</string>
  <string>metamask</string>
  <string>phantom</string>
  <string>bitkeep</string>
  <string>trust</string>
  <string>rainbow</string>
  <string>zerion</string>
  <string>mathwallet</string>
  <string>1inch</string>
  <string>awallet</string>
  <string>okex</string>
</array>
<key>NSPhotoLibraryUsageDescription</key>
  <string>We need access in order to open photos of barcodes</string>
<key>NSCameraUsageDescription</key>
  <string>We use the camera to scan barcodes</string>
Finally, you'll need to edit your Podfile to ensure particle_connect is properly imported. Head over to the linked guide to complete this if you haven't already.
Examples of Utilization
Initialization
Now that you've spun up a project on the Particle dashboard and configured your application, you're ready to move on to the initialization of the SDK itself. This must happen before the other methods become functional. To begin, you'll need to call ParticleInfo.set, passing in your projectId and client key (clientK). Next, initialization can happen through the init function on ParticleConnect, which can be imported from package:particle_connect/particle_connect.dart. init takes the following parameters:
chainInfo, aChainInfoobject representing the primary chain that you'd like to be used within Particle Connect.dappInfo, aDappMetaDataobject representing key information about your project, such as:walletConnectProjectId, your WalletConnect project ID retrieved from the WalletConnect dashboard.name, the name of your project.icon, the logo of your project, ideally in 512x512.url, the URL for your project's website.description, a short description of your project.
env, the environment in which Particle Connect will be used, either:Env.dev.Env.staging.Env.production.
Additionally, if you'd like to define multiple chains to be available through WalletConnect, you'll need to create an array of ChainInfo objects (chainInfos in this example) and use it within ParticleConnect.setWalletConnectV2SupportChainInfos. E.g.:
ParticleInfo.set(projectId, clientK);

final dappInfo = DappMetaData(
    "WalletConnect project id",
    "Particle Connect",
    "https://connect.particle.network/icons/512.png",
    "https://connect.particle.network",
    "Particle Connect Flutter Demo");
ParticleConnect.init(chainInfo, dappInfo, Env.dev);

List<ChainInfo> chainInfos = <ChainInfo>[ChainInfo.Ethereum, ChainInfo.Polygon];
ParticleConnect.setWalletConnectV2SupportChainInfos(chainInfos);
Connect
Acting as the primary method of returning a connection menu for a specific WalletType, the connect method on ParticleConnect will be the main mechanism for wallet connection within the Particle Connect SDK. ParticleConnect.connect takes one parameter, the WalletType to be requested for connection. Upon calling, the wallet specified in this field will throw an interface initiating the connection.
WalletType is an enum containing the following:
particle, social logins through Particle Auth.evmPrivateKey, custom EVM wallet imports/exports.solanaPrivateKey, custom Solana wallet imports/exports.metaMask.rainbow.trust.imToken.bitKeep.walletConnect.phantom, intended for Solana.zerion.math.zengo.alpha.okx.
If you're using Particle, you'll also need to pass in a ParticleConnectConfig object containing:
LoginType, the specific login to be prompted; enum with the following choices:email.phone.facebook.apple.twitter.discord.github.twitch.microsoft.linkedin.jwt.
account, if you're expecting a specific JWT, email, or phone (required for JWT).SupportAuthType, the different authentication types to be supported by the popup modal; this should be wrapped in an array.enumwith all of the above choices forLoginType, exceptjwt.
SocialLoginPrompt, an enum dictating the type of social login prompt to be thrown, either:select_account.consent.none.
LoginAuthorization, a string (hex for EVM, base58 for Solana) to be prompted for signature upon login as authorization (optional.)
E.g:
final result = await ParticleConnect.connect(WalletType.particle);
Disconnect
Once a user has been connected, entering an active session, you'll have the ability to disconnect them from your application programmatically through ParticleConnect.disconnect, which requires a targeted WalletType and address (publicAddress in this case). This pair dictates the specific session (user) to be disconnected. E.g.:
String result = await ParticleConnect.disconnect(WalletType.particle, publicAddress);
Is Connected
Another common method is ParticleConnect.isConnected, returning a Boolean representing whether or not a user (defined by a paired WalletType and address) is currently connected to your application. E.g.:
bool result = await ParticleConnect.isConnected(WalletType.particle, publicAddress);
Sign Message
A simple message (UTF-8 string) can be signed on both EVM & Solana through ParticleConnect.signMessage, passing in the WalletType, address (publicAddress in this example), and the message in question. message should either be a hex-encoded string for EVM, or a base58 string for Solana. E.g.:
String result = await ParticleConnect.signMessage(WalletType.particle, publicAddress, message);
Sign Transaction
For Solana, as an alternative to signAndSendTransaction, you can sign a given transaction without pushing it to the network with ParticleConnect.signTransaction, taking WalletType, address (publicAddress), and a base58 transaction string representing a structured transaction object.
Alternatively, the plural of this method is ParticleConnect.signAllTransactions, which instead takes an array of base58 transaction strings to be prompted for signature.
String result = await ParticleConnect.signTransaction(WalletType.particle, publicAddress, transaction);

// Plural
String result = await ParticleConnect.signAllTransactions(WalletType.particle, publicAddress, transactions);
Sign and Send Transaction
Used as the primary mechanism of sending transactions, ParticleConnect.signAndSendTransaction takes in a transaction and prompts a user (through a UI corresponding with WalletType) for confirmation/signature. Specifically, ParticleConnect.signAndSendTransaction takes a WalletType, address (publicAddress), and transaction string. For EVM chains, this should be a hex-encoded stringor Solana, this should be a base58 string. An example of this can be found below.
String result = await ParticleConnect.signAndSendTransaction(WalletType.particle, publicAddress, transaction);
Sign Typed Data
Additionally, for EVM chains, if standard UTF-8 string signatures aren't enough, you can use ParticleConnect.signTypedData to prompt signature of typed (structured) data, adjacent to eth_signTypedData. ParticleConnect.signTypedData requires WalletType, address (publicAddress), and the typedData to be signed. typedData should be a hex-encoded string representing a data structure. E.g.:
String result = await ParticleConnect.signTypedData(walletType, publicAddress, typedDataHex);
Import Wallet
If you're using evmPrivateKey or solanaPrivateKey wallet types, you can import wallets through either a seed phrase or private key. These methods will associate an account instance derived from these keys, allowing utilization within your application. These can be achieved through either importPrivateKey for importing a private key, or importMnemonic for importing a mnemonic (seed phrase). Both of these methods require both the WalletType (either evmPrivateKey or solanaPrivateKey) and the private key/seed phrase to be imported.
Additionally, you can export one of these wallets with ParticleConnect.exportPrivateKey, passing in the address (of the evmPrivateKey or solanaPrivateKey imported/generated wallet) that you'd like to export.
await ParticleConnect.importPrivateKey(WalletType.evmPrivateKey, privateKey);

await ParticleConnect.importMnemonic(WalletType.evmPrivateKey, mnemonic);

// Exportation
await ParticleConnect.exportPrivateKey(WalletType.evmPrivateKey, publicAddress);
Master reference
For a direct, raw view into every method provided through ParticleConnect, below is a table containing every relevant one, alongside specific parameters and a short description. For methods listed that weren't covered in the above examples, live implementation often mimics the common structure covered throughout this document.
| Class | Methods | Parameters (* indicates optional) |
|---|---|---|
| ParticleConnect | init | chainInfo, env, metadata, rpcUrl* |
| ParticleConnect | setWalletConnectV2SupportChainInfos | chainInfos |
| ParticleConnect | getAccounts | walletType |
| ParticleConnect | connect | walletType, config* |
| ParticleConnect | disconnect | walletType, publicAddress |
| ParticleConnect | isConnected | walletType, publicAddress |
| ParticleConnect | signMessage | walletType, publicAddress, message |
| ParticleConnect | signTransaction | walletType, publicAddress, transaction |
| ParticleConnect | signAllTransactions | walletType, publicAddress, transactions |
| ParticleConnect | signAndSendTransaction | walletType, publicAddress, transaction, feeMode* |
| ParticleConnect | batchSendTransactions | walletType, publicAddress, transactions, feeMode* |
| ParticleConnect | signTypedData | walletType, publicAddress, typedData |
| ParticleConnect | login | walletType, publicAddress, domain, uri |
| ParticleConnect | verify | walletType, publicAddress, message, signature |
| ParticleConnect | importPrivateKey | walletType, privateKey |
| ParticleConnect | importMnemonic | walletType, mnemonic |
| ParticleConnect | exportPrivateKey | walletType, publicAddress |
| ParticleConnect | reconnectIfNeeded | walletType, publicAddress |
